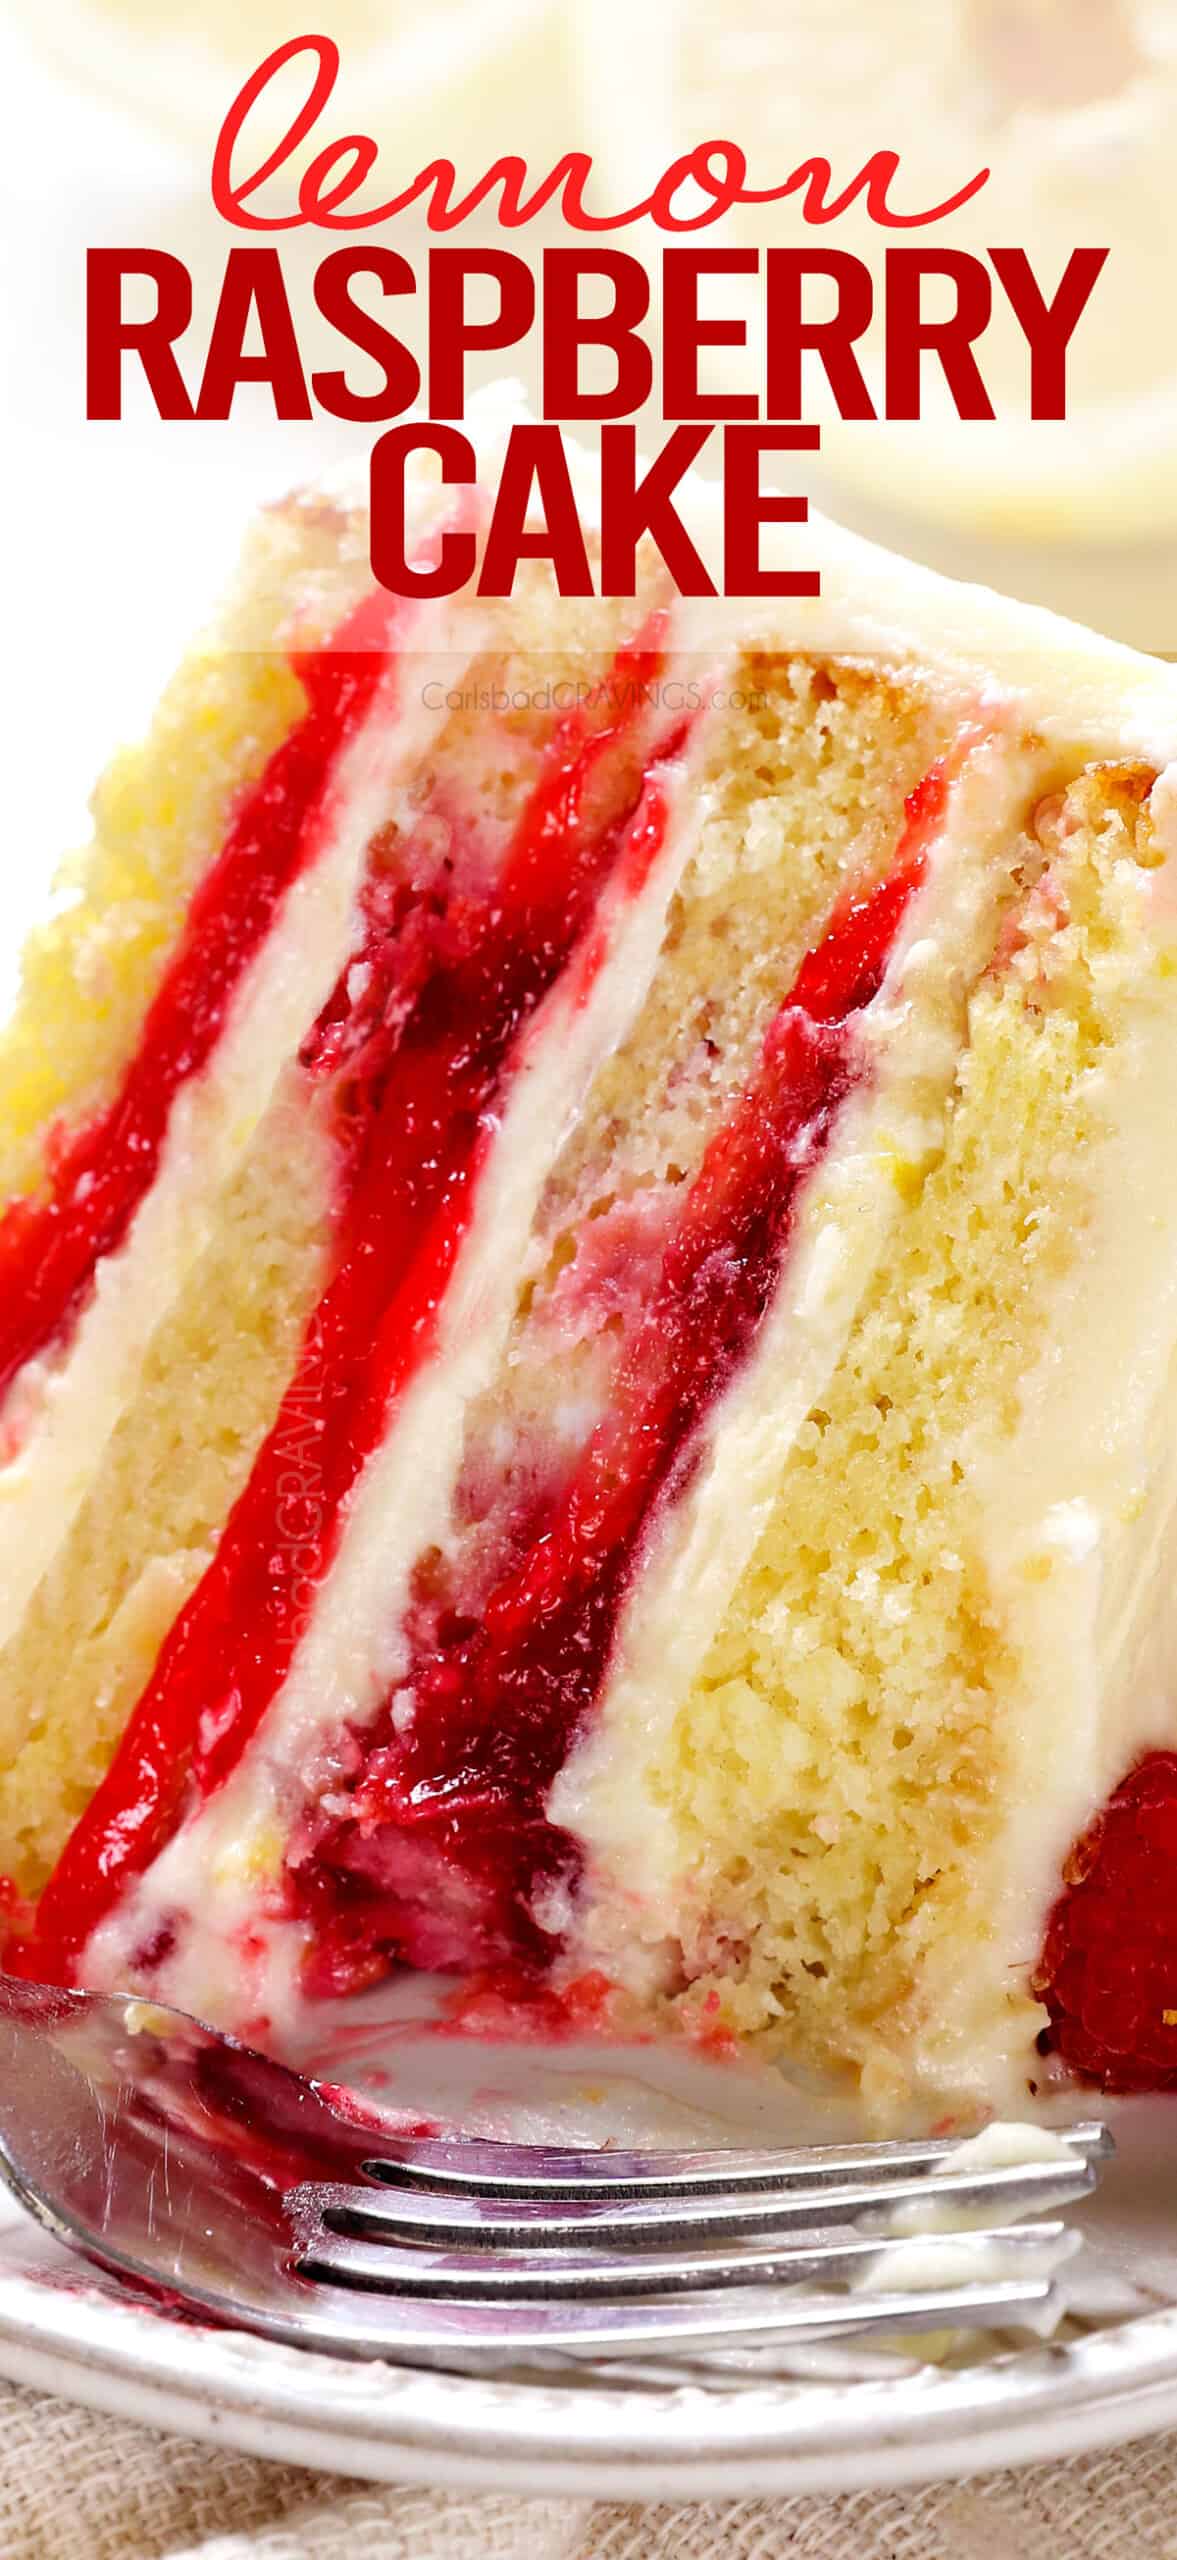
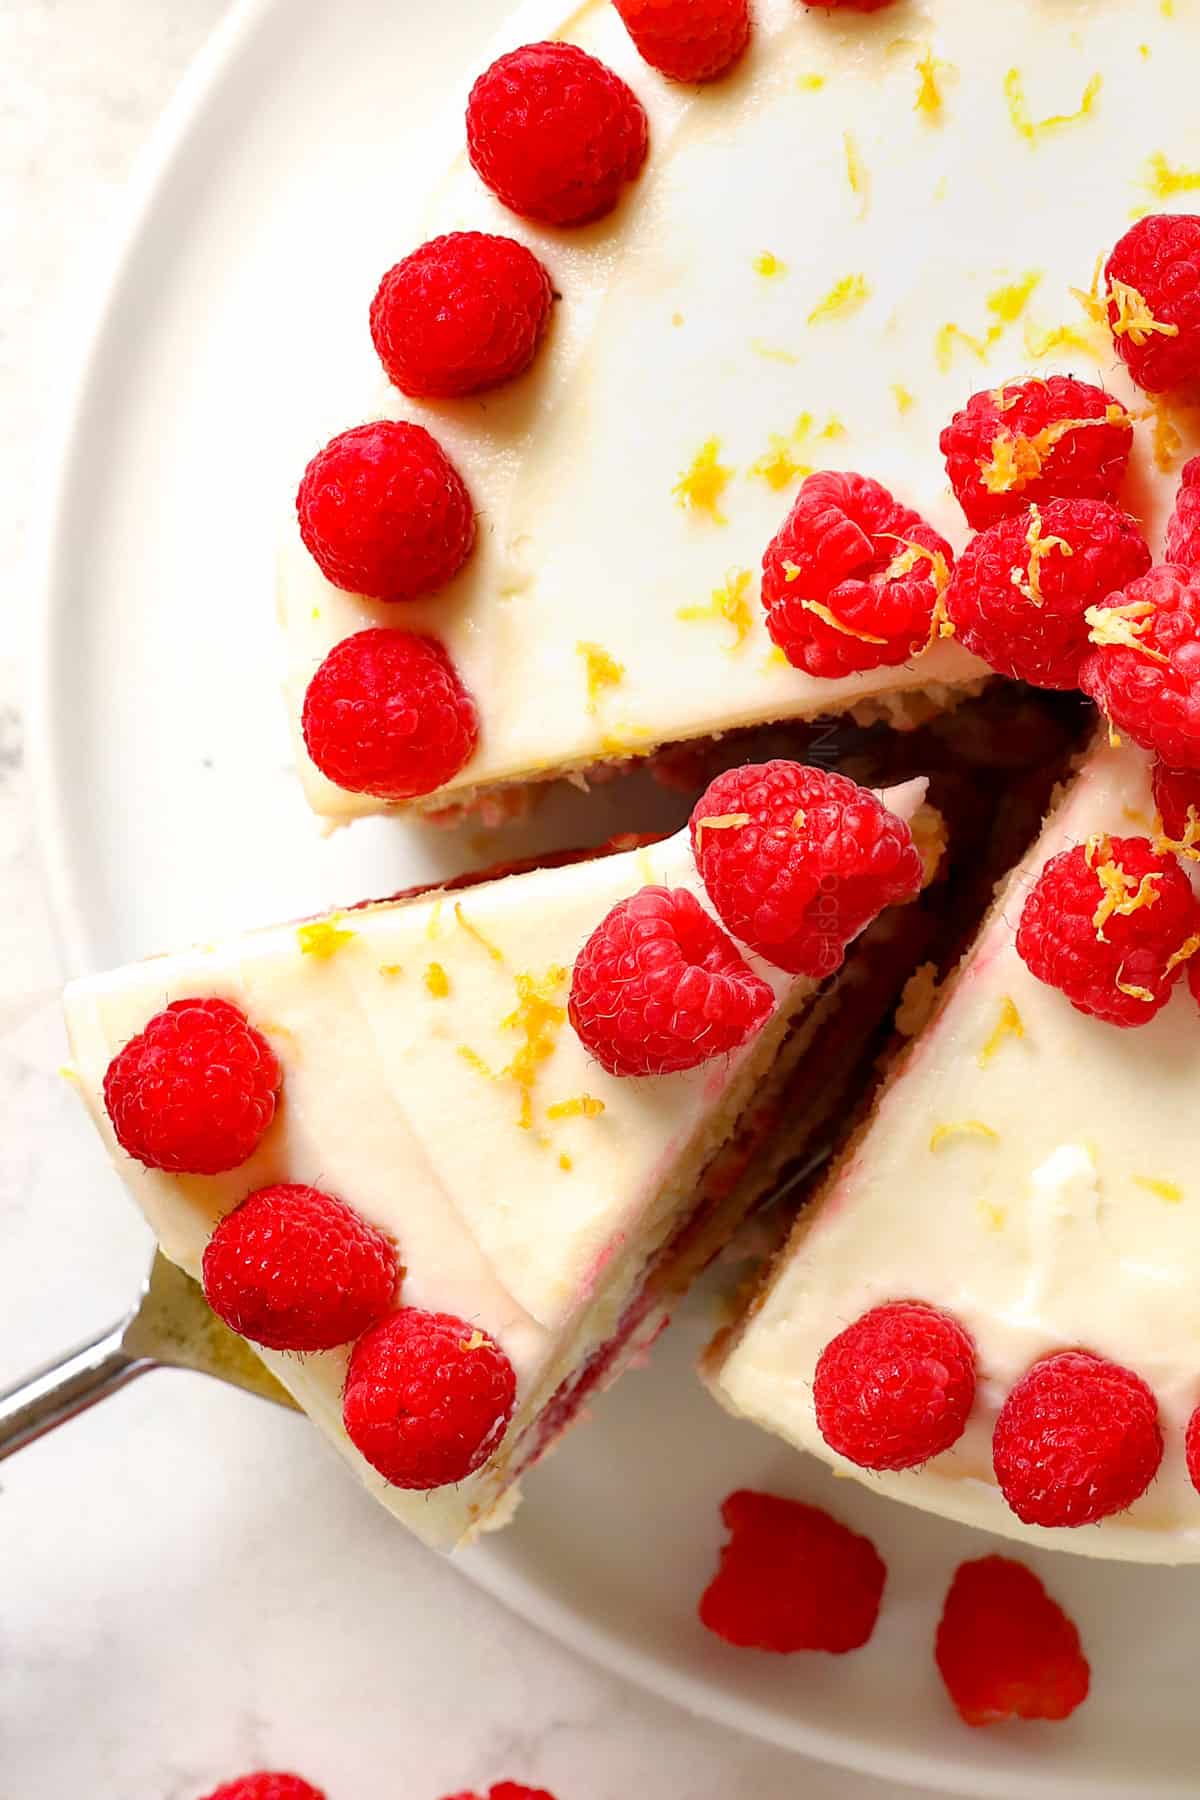
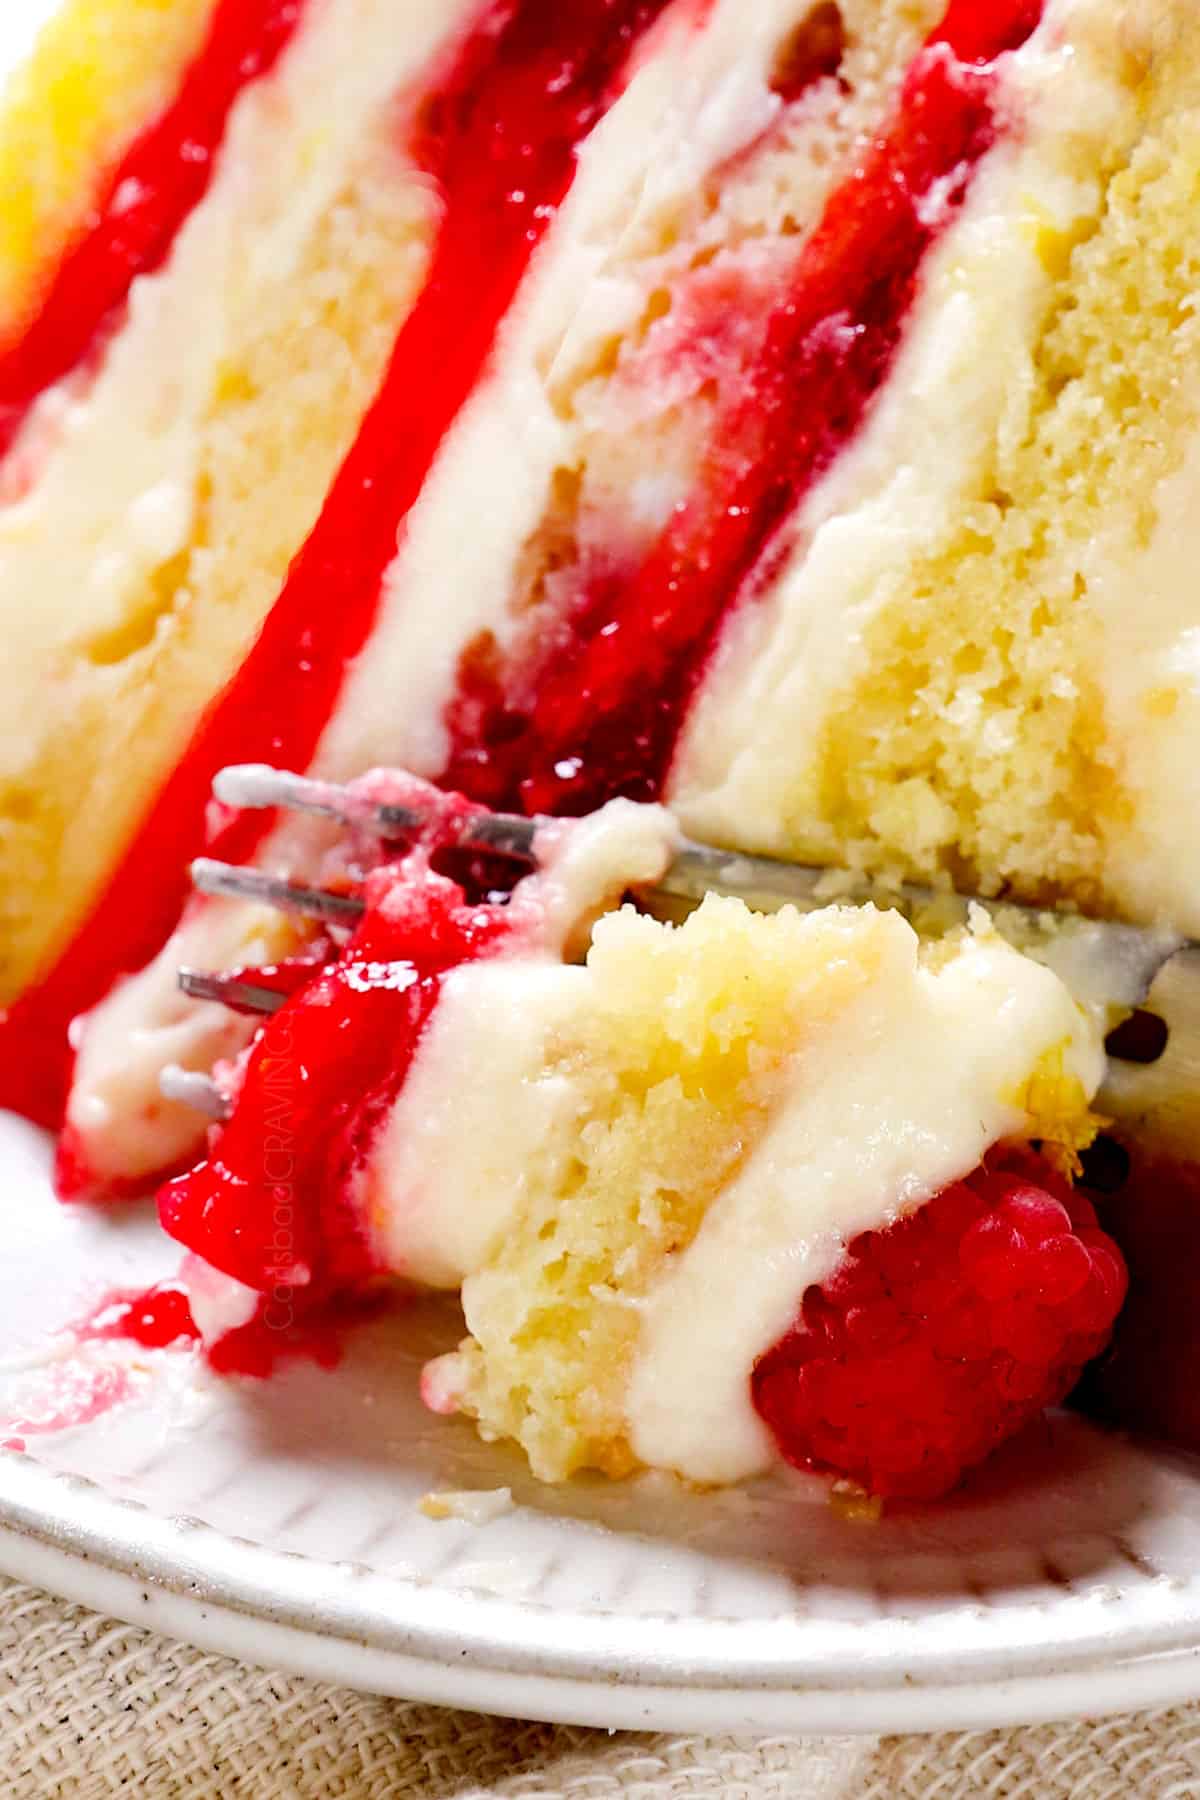
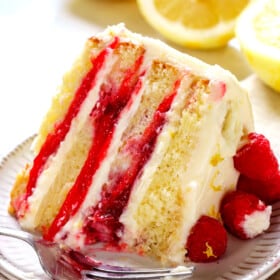
This Lemon Raspberry Cake recipe is a show-stopping dessert with its bright, tangy lemon flavor, mega moistness (thanks to the reverse creaming method), layers of raspberry filling, and lemon cream cheese frosting. It has readers raving: “Wow. This cake was perfection,” “The perfect texture,” and my husband claimed it was the best cake he had ever tried!
Learn how to make this recipe 100% ahead of time or in stages with step-by-step photos, a full video tutorial, and plenty of helpful tips.
Raspberry Cake Recipe Video

Everything you’ll love about this Raspberry Cake Recipe
This Raspberry Lemon Cake is truly ethereal—tested and perfected for the ultimate balance of bright citrus and juicy berries—and worth every second of making. Here’s why:

Lemon Raspberry Cake Ingredients
The ingredient list for this Lemon Raspberry Cake recipe may seem lengthy, but most of the ingredients are pantry staples and are used multiple times in the cake, filling, and/or frosting. Let’s take a closer look at what you need (measurements in the printable recipe card at the bottom of the post):
For the Lemon cake

HOW TO MAKE YOUR OWN CAKE FLOUR
For this recipe, substitute 1 ¾ cups all-purpose flour and ¼ cup cornstarch for the cake flour. Sift the flour and cornstarch together in a large bowl, then repeat the sifting 2-3 more times to aerate the mixture, bringing it closer to the consistency of real cake flour.
‘
FOR THE Raspberry Filling
Making raspberry filling is straightforward with this recipe, or you can use store-bought jam.
FOR THE LEMON CREAM CHEESE FROSTING

How to Make This Raspberry Cake Recipe
The key to making this recipe is to give yourself time, as it benefits from chilling at multiple stages.
Let’s take a closer look at how to make this recipe or watch the How to Make Video in the recipe card (full recipe measurements in the printable recipe card at the bottom of the post):
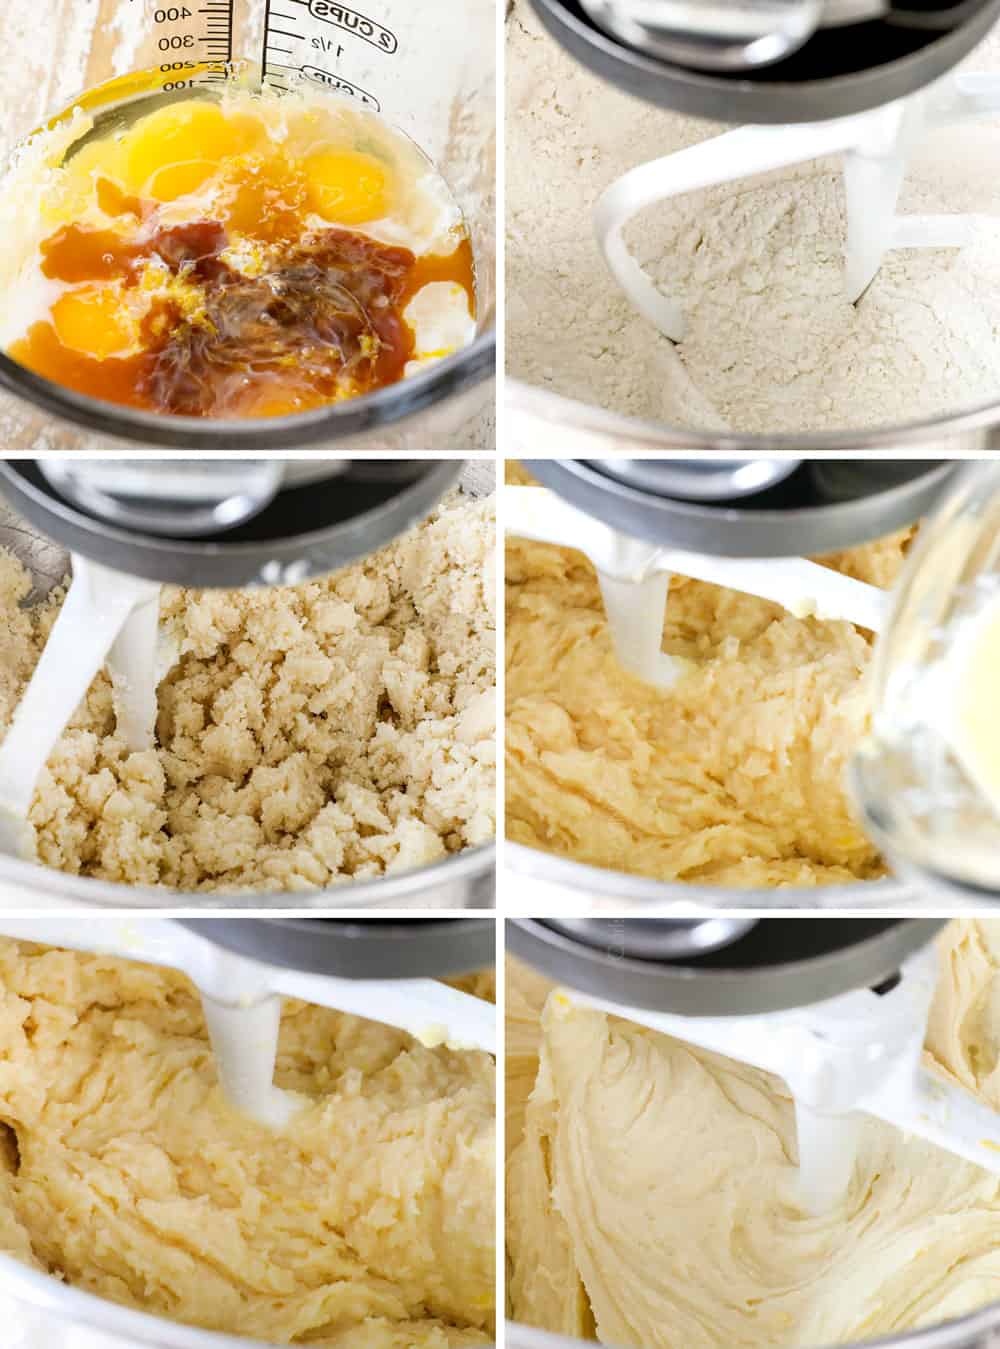
STEP 1: MAKE THE CAKE BATTER
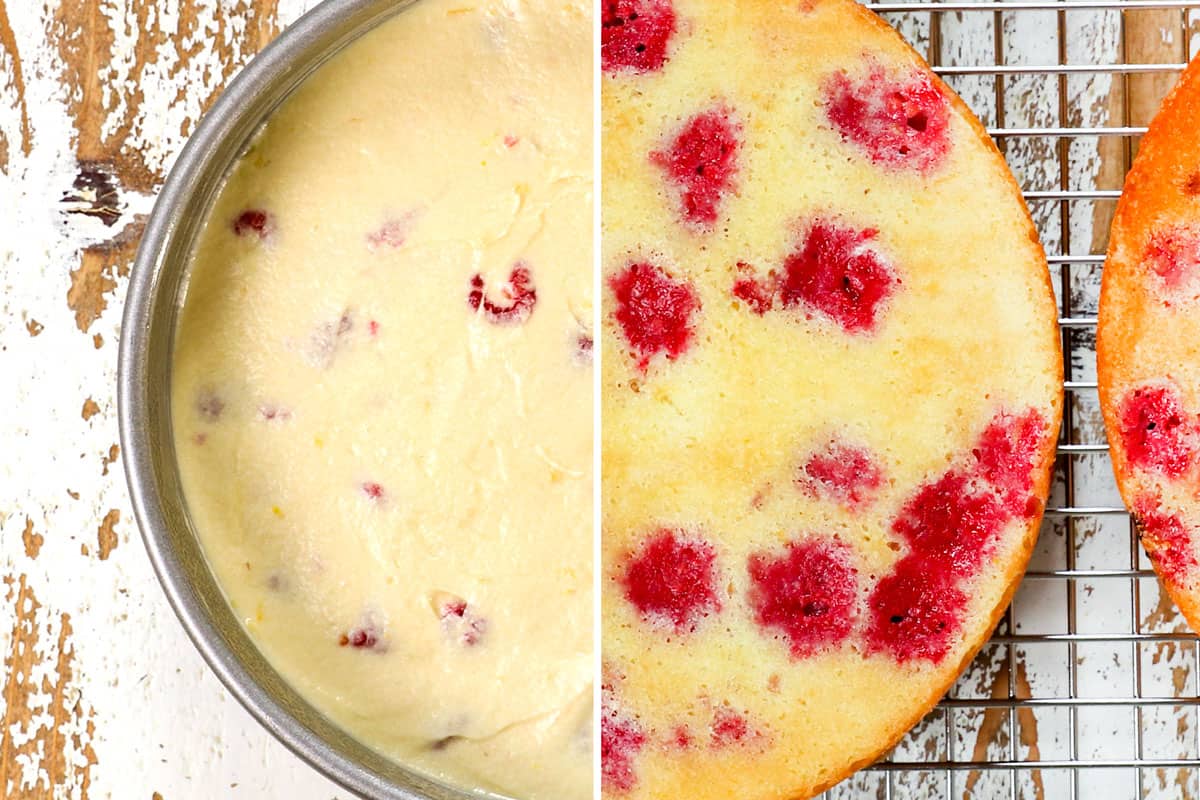
STEP 2: BAKE THE CAKES
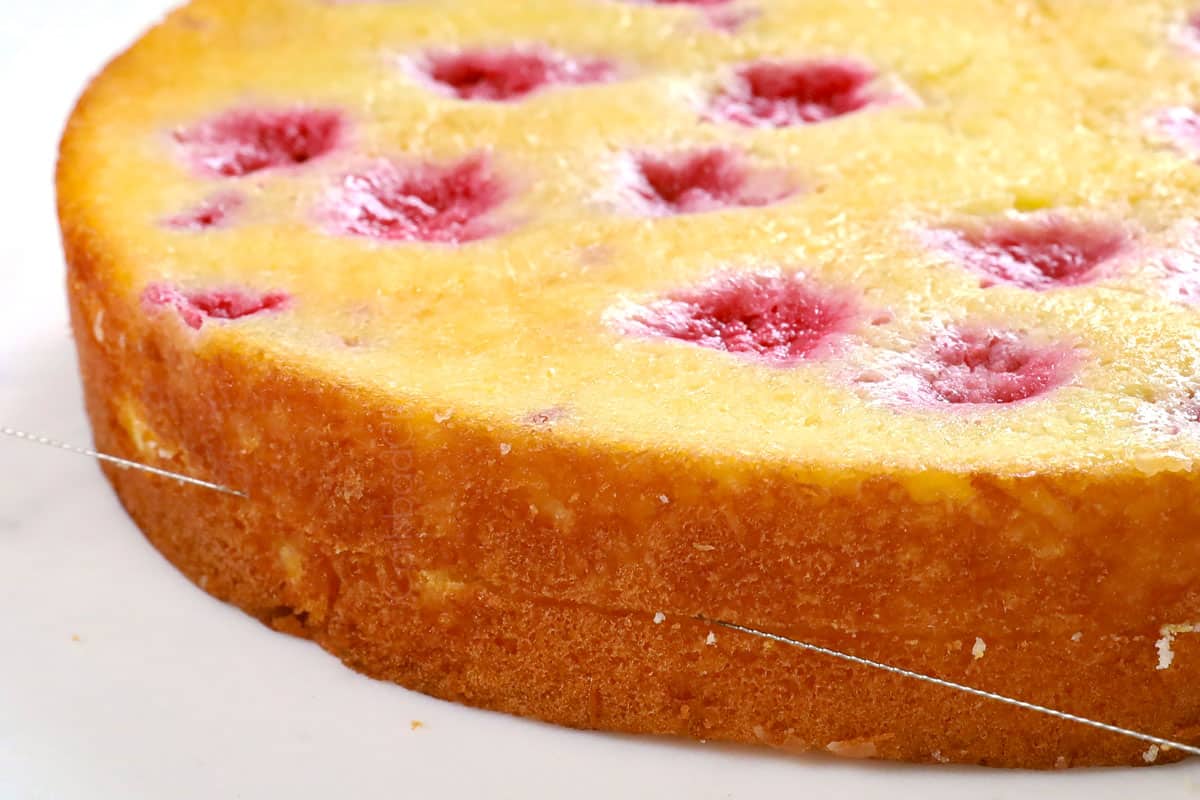
sTEP 3: cut the cakes in half
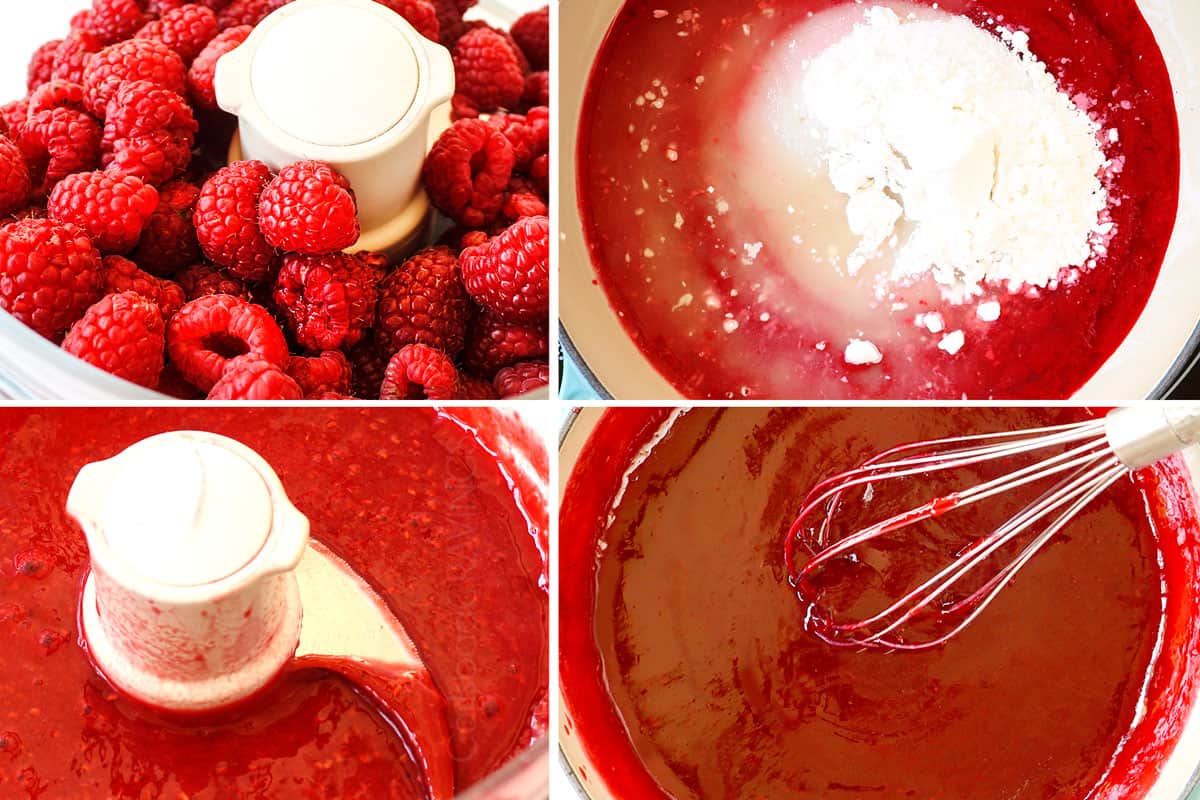
sTEP 4: MAKE THE Raspberry filling
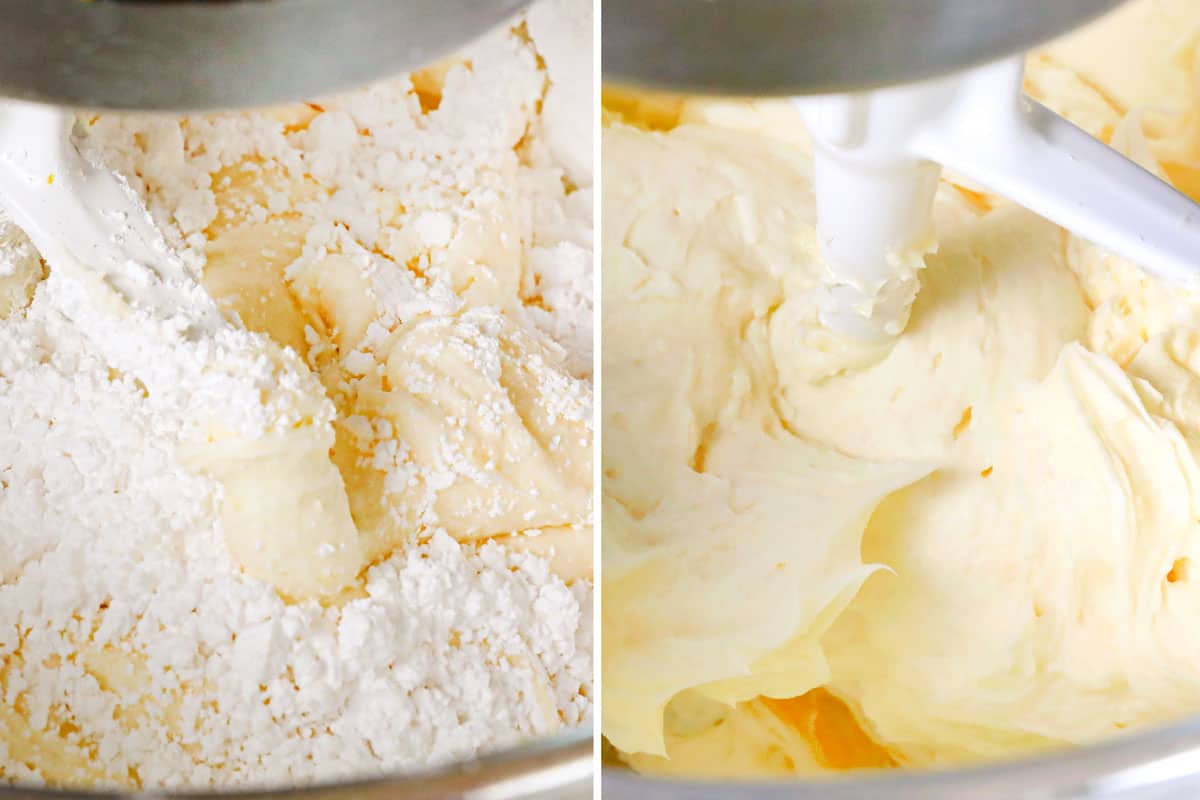
sTEP 5: MAKE THE FROSTING
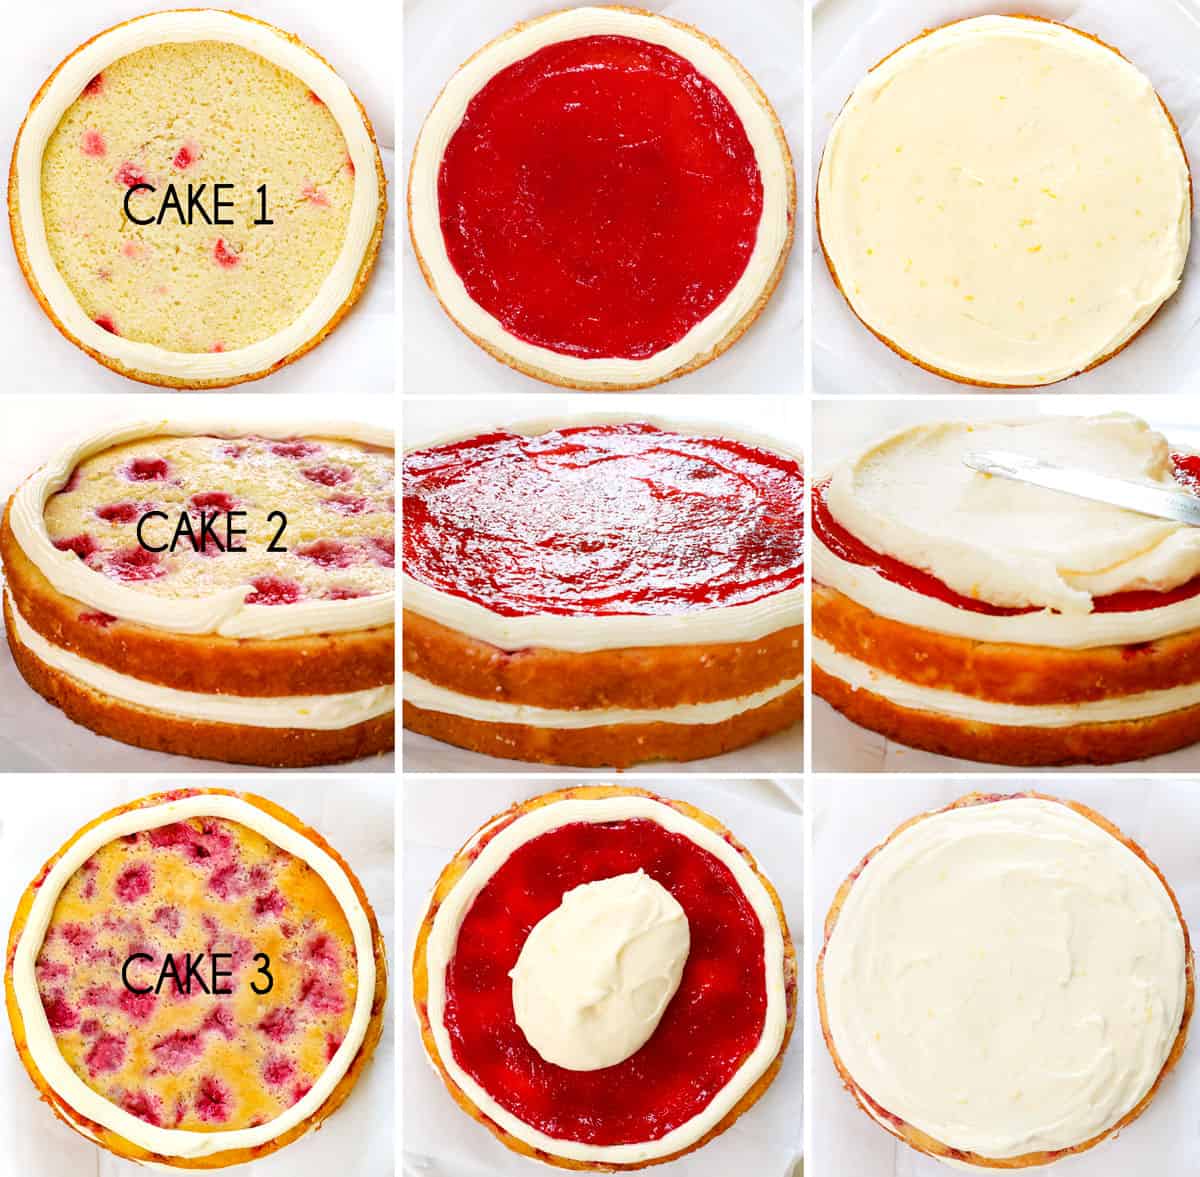
STEP 6: ASSEMBLE THE CAKE
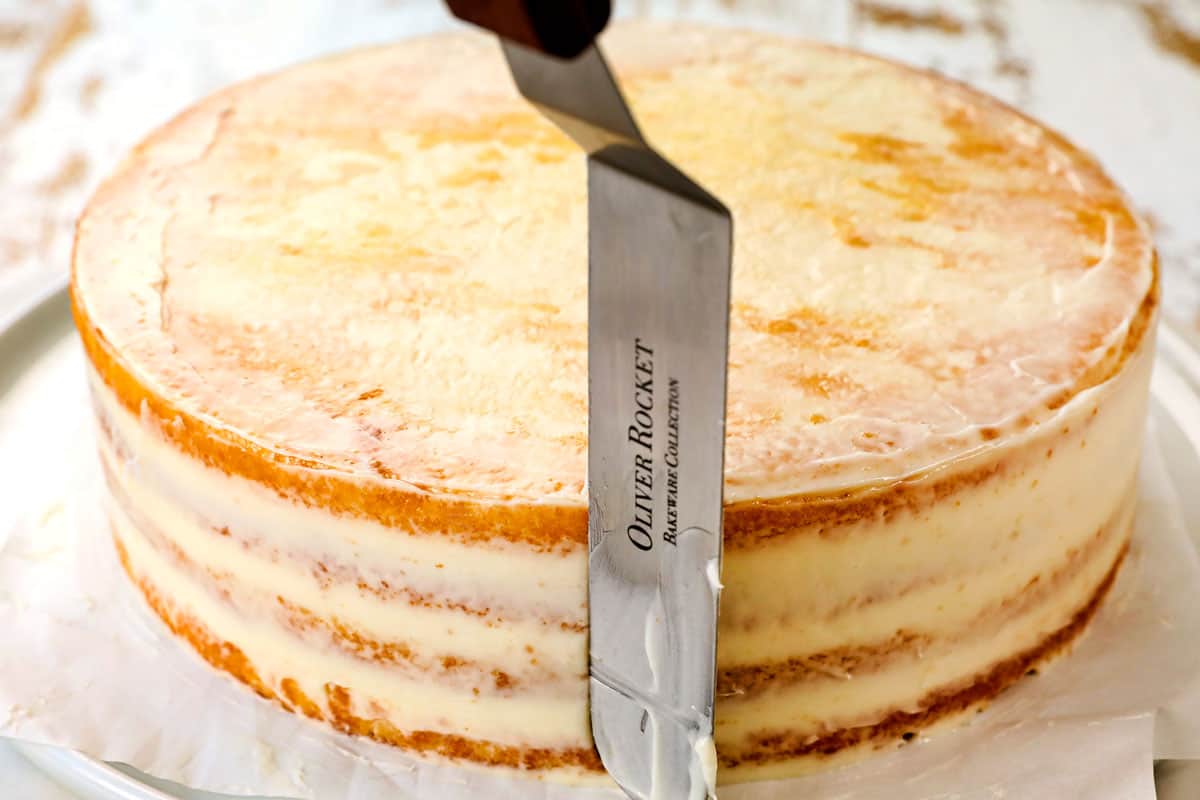
TIPS FOR Cutting Cakes in Half
If you don’t own a cake leveler, you can still create even cake layers! Here’s how:
1. Chill the cakes: Freeze for 20–40 minutes for easier slicing.
2. Stabilize: Place on a cutting board and use a serrated knife.
3. Get eye level: Line up your knife so you can see both sides evenly.
4. Score first: Lightly mark around the cake to create a guide.
5. Slice gradually: Cut along the line, rotating the cake, instead of cutting straight through to keep layers even..
Step 7: FROST CAKE

STEP 8: CHILL and Slice

MAke Ahead Raspberry Lemon Cake
Make the cake entirely ahead of time, or in stages. Here’s how:
•Raspberry filling: Make up to 1 week ahead (refrigerate) or freeze up to 3 months.
•Frosting: Prep up to 24 hours ahead; refrigerate, then bring to room temp and re-whip if needed.
•Cake layers: Bake, cool, and wrap tightly; refrigerate 1 day or freeze up to 3 months.
•Crumb coat: Let set, then wrap and refrigerate or freeze until ready to finish.
•Frosted cake: Assemble and refrigerate up to 24 hours; bring to room temp before serving.
Raspberry Cake Recipe Tips
Follow these tips and tricks for a runaway, light, and lemony, ultra-tender success!
TIPS FOR PICKING LEMONS
Lemons are the star of the show, so let’s pick good ones! Look for lemons that are bright yellow without soft spots, have a clean, sharp citrussy fragrance, are heavy for their size, yield slightly when gently squeezed, and are smaller, which means they have thinner skins and are best for juicing.
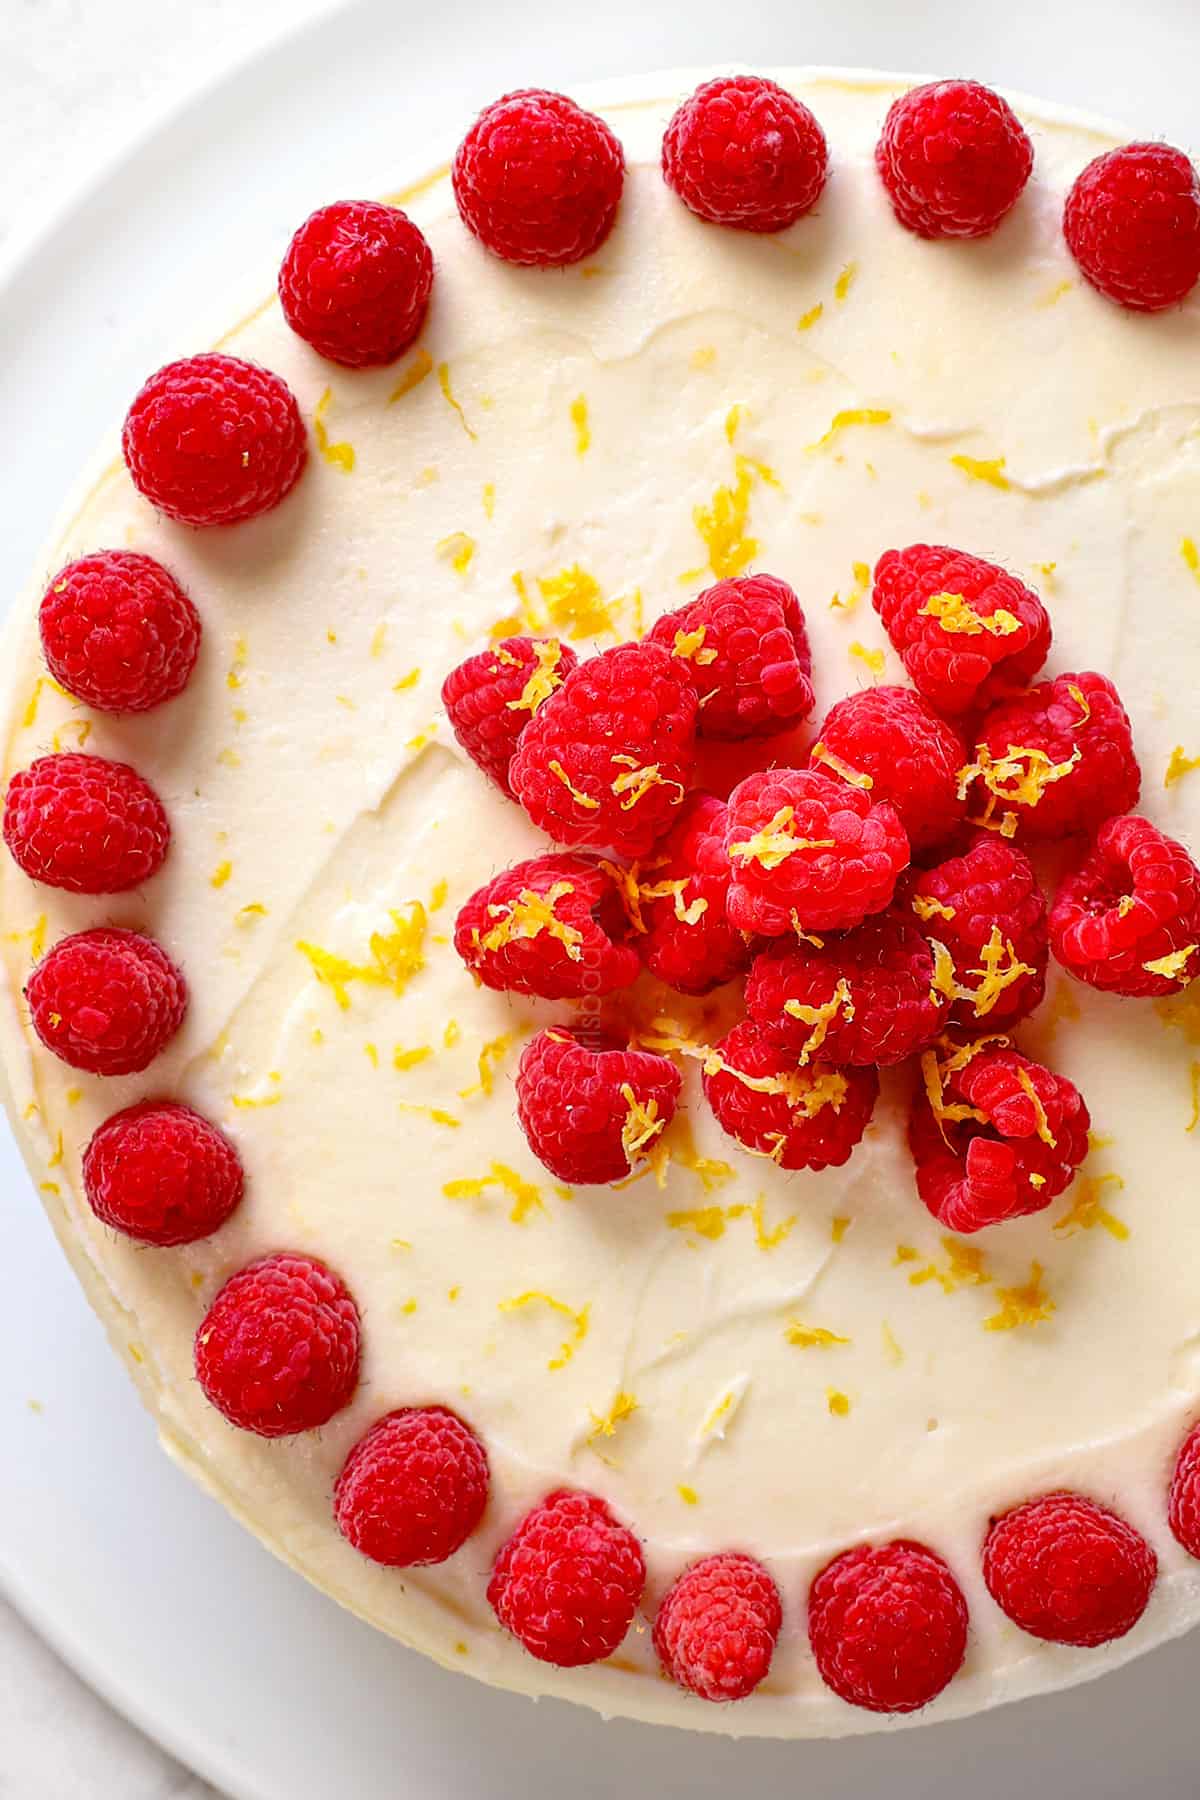
Tips for decorating your Raspberry and Lemon Cake
Chill your cake again and again! Chilling firms up all of the components of the cake so they don’t slide around while decorating or slicing:
•Chill the raspberry filling for at least 2 hours before using
•Chill the cakes before slicing to help firm them up
•Chill the cakes after frosting the layers, but before adding the crumb coat
•Chill the cake after frosting so it’s a breeze to slice
•Purchase extra raspberries to decorate the top of the cake in swirls or any design
Tips for Frosting Your Raspberry and Lemon Cake
•Don’t microwave the cream cheese or butter: Soften at room temperature, to room temperature. If you soften them in the microwave, your frosting will be runny and create a wobbly mess.
•Thicken the frosting as needed: If it’s too thin or runny, pop it into the refrigerator for 15 minutes rather than adding additional powdered sugar.

Variations

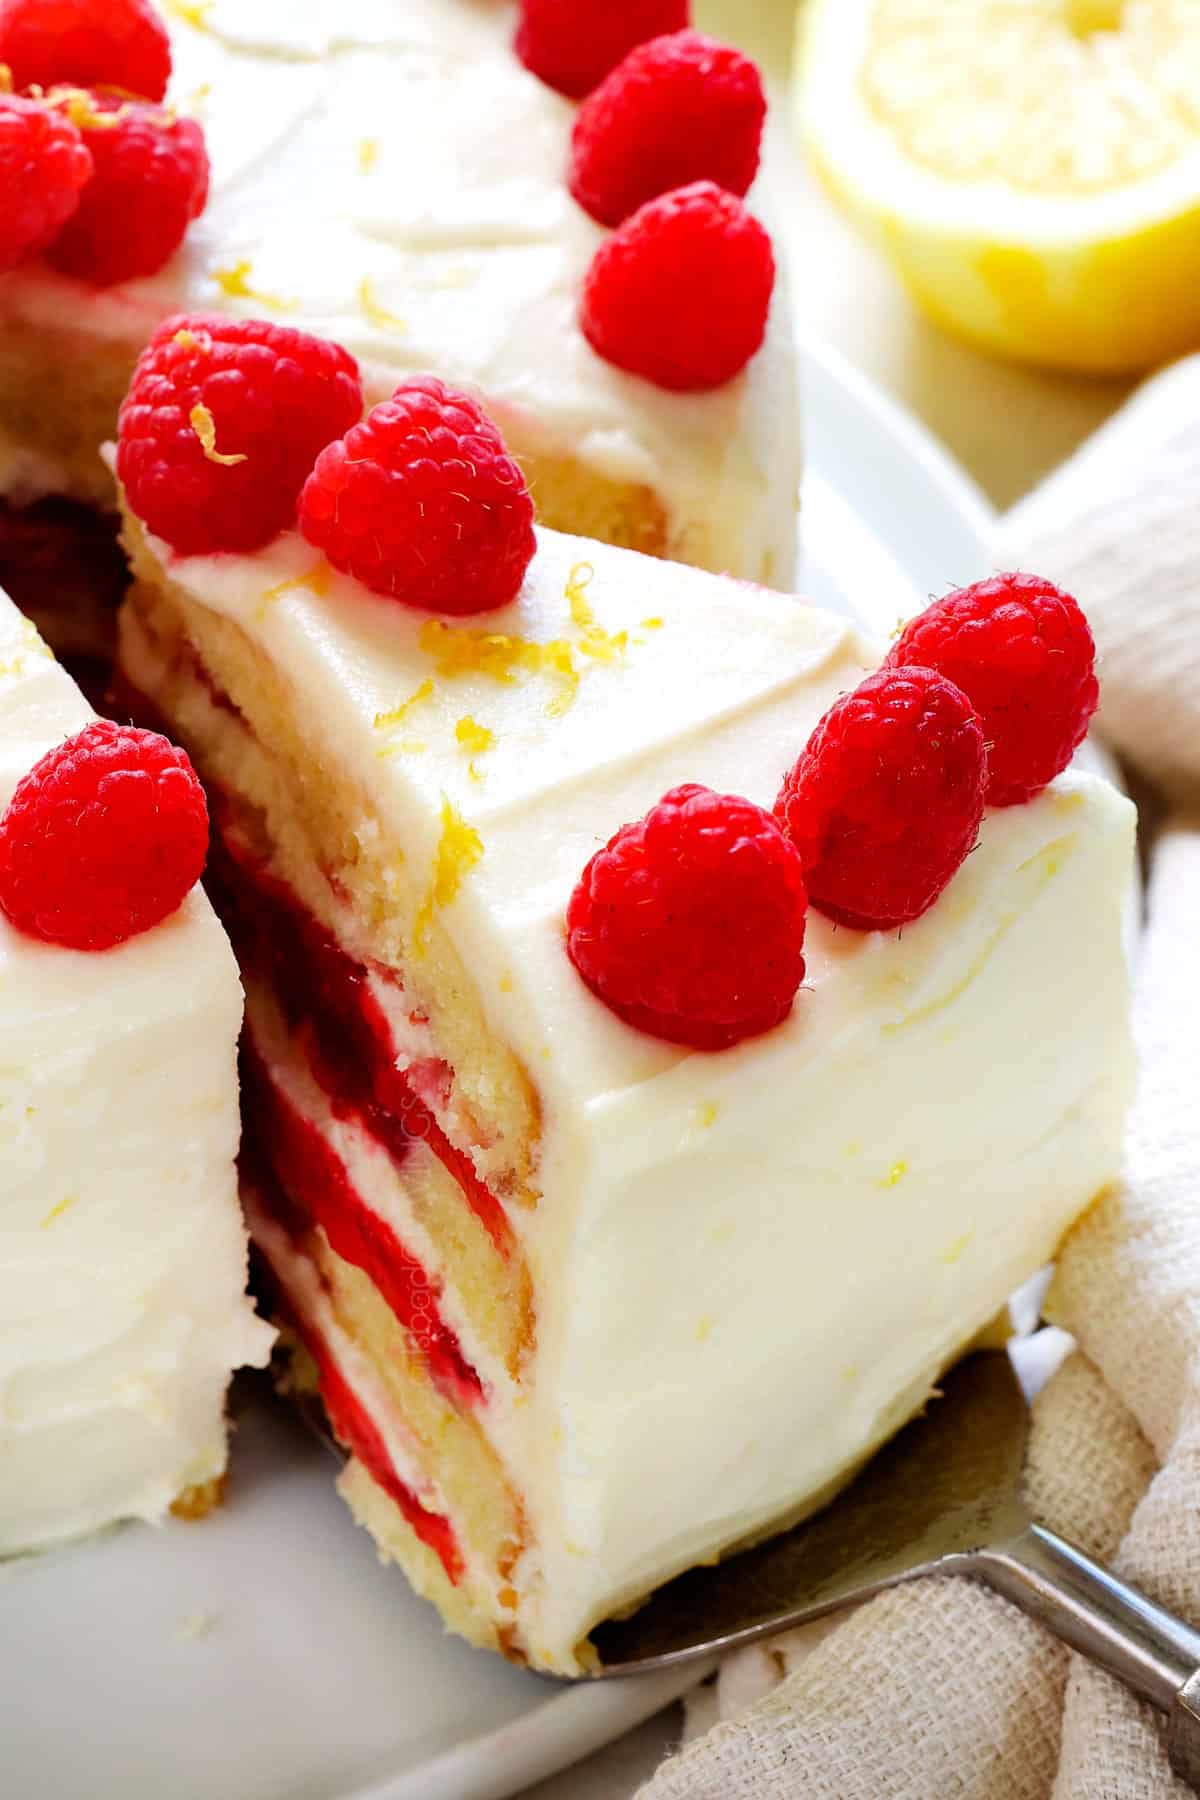
Our favorite way to serve this Raspberry Lemon Cake Recipe
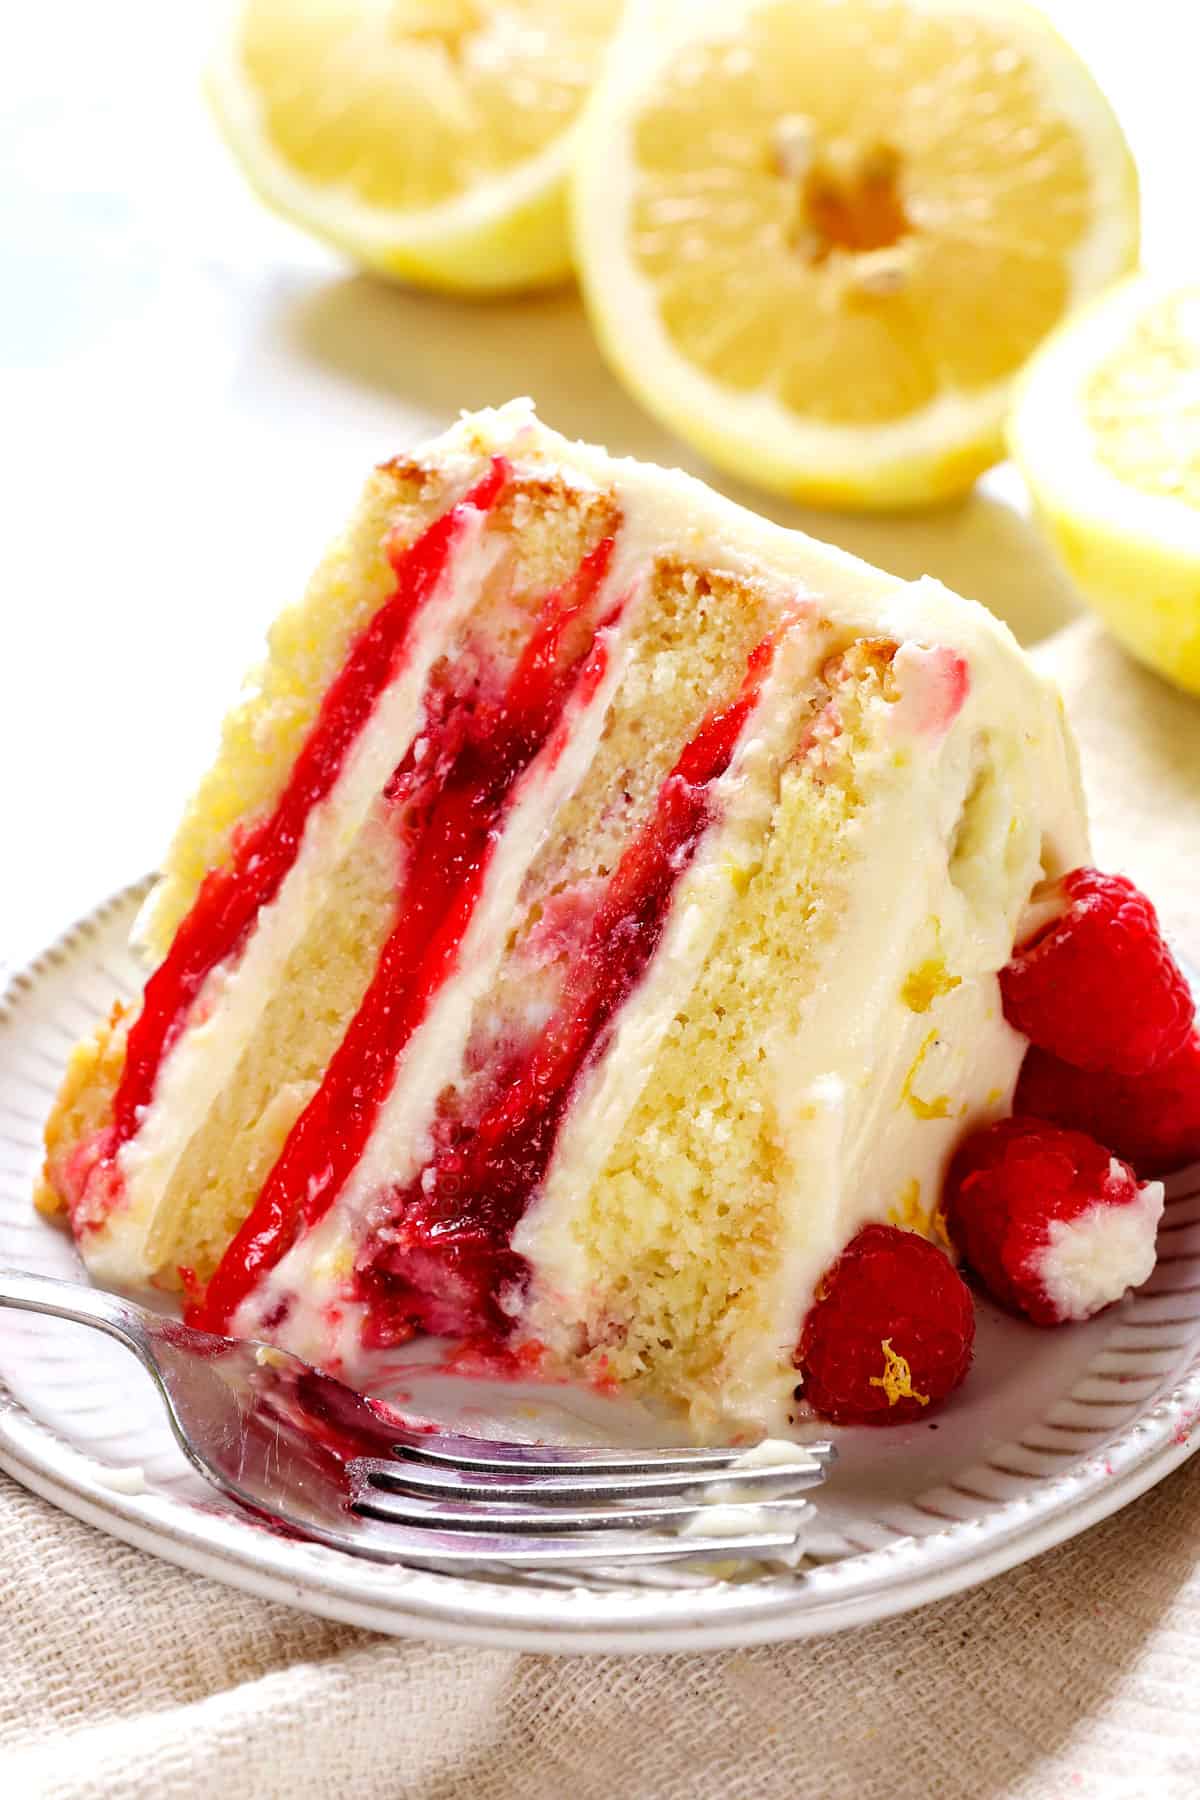
This Lemon Raspberry Cake is best served at room temperature instead of chilled, but easiest to slice when chilled (otherwise the filling squeezes out). So, slice the cake fresh from the refrigerator, then let it come to room temperature for 30 minutes or so before serving.


Storing your leftover Raspberry Lemon Cake
The assembled and frosted cake should be covered with a cake cover or foil and refrigerated. It may be stored for up to 5 days, but is at peak freshness the first two days. Slice the cake, then bring it to room temperature before serving.
HOW TO Freeze Lemon Raspberry Cake
•Cake layers: Wrap tightly in plastic wrap and freeze up to 3 months.
•Crumb-coated cake: Wrap in plastic wrap and foil; freeze up to 2 months.
•Frosted cake: Flash freeze until firm, then wrap in plastic wrap and foil; freeze up to 2 months. Thaw overnight in the fridge, then bring to room temp before serving.
Lemon Raspberry Cake Recipe FAQs
You’ve heard it here many times, and no doubt in other recipes, so why use room temperature ingredients when baking a cake? Is it that important? The answer is YES! It is essential that you use room temperature eggs, milk, lemon juice, and butter for this recipe, or your cake will not rise properly or be as tender. Here’s why:
1. Room temperature ingredients bind together more easily than if you had some cold and some warmer ingredients – you can literally feel the difference when mixing by hand. In other words, the batter is easier to NOT overmix and overwork the gluten, which creates more even lift and rise in the cake when baking.
2. Cold ingredients require longer to bind together, so they are easy to overmix, which overdevelops the gluten, making a denser cake.
Cold eggs and milk can break the emulsion of the sugar and butter, so the batter loses air cells, resulting in a baked cake that is grainy or flat in texture, dry, or dense.
3. Cold ingredients also produce a thicker, colder batter, which takes longer to bake, which changes the entire structure and texture of the cake.
Yes, you can use frozen raspberries in a lemon cake. Frozen raspberries can be a convenient option when fresh raspberries are not in season or readily available. Here’s a general guideline on how to incorporate frozen raspberries into a cake:
1. Thaw the Raspberries: Allow the frozen raspberries to thaw completely. You can do this by placing them in a colander or sieve and allowing them to sit at room temperature for about 30 minutes. Once thawed, gently blot them with a paper towel to remove any excess moisture.
2. Adjust for Moisture: Frozen raspberries tend to release more moisture when baked, so it’s a good idea to slightly adjust the moisture content of your cake batter. You can achieve this by reducing the amount of liquid (such as milk) in the cake recipe by about 1 tablespoon.
3. Adjust Baking Time: Since frozen raspberries can add extra moisture to the batter, it may slightly affect the baking time. Keep an eye on the cake as it bakes and use a toothpick or cake tester to check for doneness. If needed, bake the cake for a few minutes longer than the original recipe suggests.
To increase the lemon flavor of a cake, without altering the texture, add additional lemon zest or lemon extract. Don’t add additional lemon juice as excess moisture will affect the texture. For this Raspberry Lemon Cake, I caution against increasing the lemon flavoring because it will overpower the raspberries.

Looking for more Lemon RAspberry cake recipes?
Lemon Blueberry Cake
Lemon Cake
Lemon Pound Cake
Lemon Cheesecake
Lemon Cheesecake Bars
Lemon Pound Cake
Chocolate Raspberry Cake
White Chocolate Raspberry Cake
Raspberry Crumble Bars
WANT TO TRY THIS Lemon Raspberry Cake RECIPE?
PIN IT TO YOUR Cake or Dessert recipe BOARD TO SAVE FOR LATER!
FIND ME ON PINTEREST FOR MORE GREAT RECIPES! I AM ALWAYS PINNING :)!
©Carlsbad Cravings by CarlsbadCravings.com

Lemon Raspberry Cake Recipe
Save This Recipe To Your Recipe Box
You can now create an account on our site and save your favorite recipes all in one place!
Ingredients
CAKE
- 9 oz. (approx. 1 ½ cups) raspberries + 1 tablespoon flour
- 4 large eggs, room temperature
- 1/3 cup milk (anything but nonfat), room temperature
- 2 tablespoons lemon juice, room temperature
- 1 tablespoon lemon zest
- 2 teaspoons vanilla extract
- 2 cups cake flour (see DIY in Notes)
- 1 1/2 cups granulated sugar
- 2 teaspoons baking powder
- 3/4 teaspoon salt
- 16 tablespoons unsalted butter cut into 16 pieces, room temperature
RASPBERRY JAM FILLING
- 16 ounces ripe fresh raspberries or frozen thawed raspberries
- 2/3 cup granulated sugar
- 2 1/2 tablespoons cornstarch
- 2 1/2 tablespoons lemon juice
LEMON CREAM CHEESE FROSTING
- 16 oz. full-fat brick style cream cheese, room temperature (DON'T microwave)
- 1 cup (2 sticks) unsalted butter, room temperature (DON'T microwave)
- 2 tablespoons lemon juice
- 1-2 tablespoons fresh lemon zest (depending on how tangy you like it)
- 1 teaspoon vanilla extract
- 1/8 teaspoon salt, plus more to taste
- 6 cups powdered sugar
Instructions
RASPBERRY JAM FILLING (SEE NOTES FOR STORE-BOUGHT)
- Make the raspberry filling first if trying to assemble the cake more quickly so it has time to chill. Otherwise, make it while the cake is baking to multitask.
- Puree raspberries: Add 16 ounces of raspberries to a food processor and puree. Place a fine-mesh sieve over a medium saucepan and add the raspberry puree to strain out the seeds. Press the puree down with the back of a spoon or spatula until only seeds remain in the sieve. Take care to wipe the back of your sieve to get all of the puree.
- Thicken: Whisk the cornstarch, sugar, and lemon juice into the puree until the cornstarch is mostly dissolved. Bring to a simmer until thickened. Refrigerate until completely chilled (it will thicken more as it chills).
CAKE
- Prep: Preheat oven to 350°F. Line the bottom of two 8-inch round cake pans with parchment paper (or I love these silicone mats). Spray the pans with nonstick cooking spray WITH flour or butter and flour the pans.
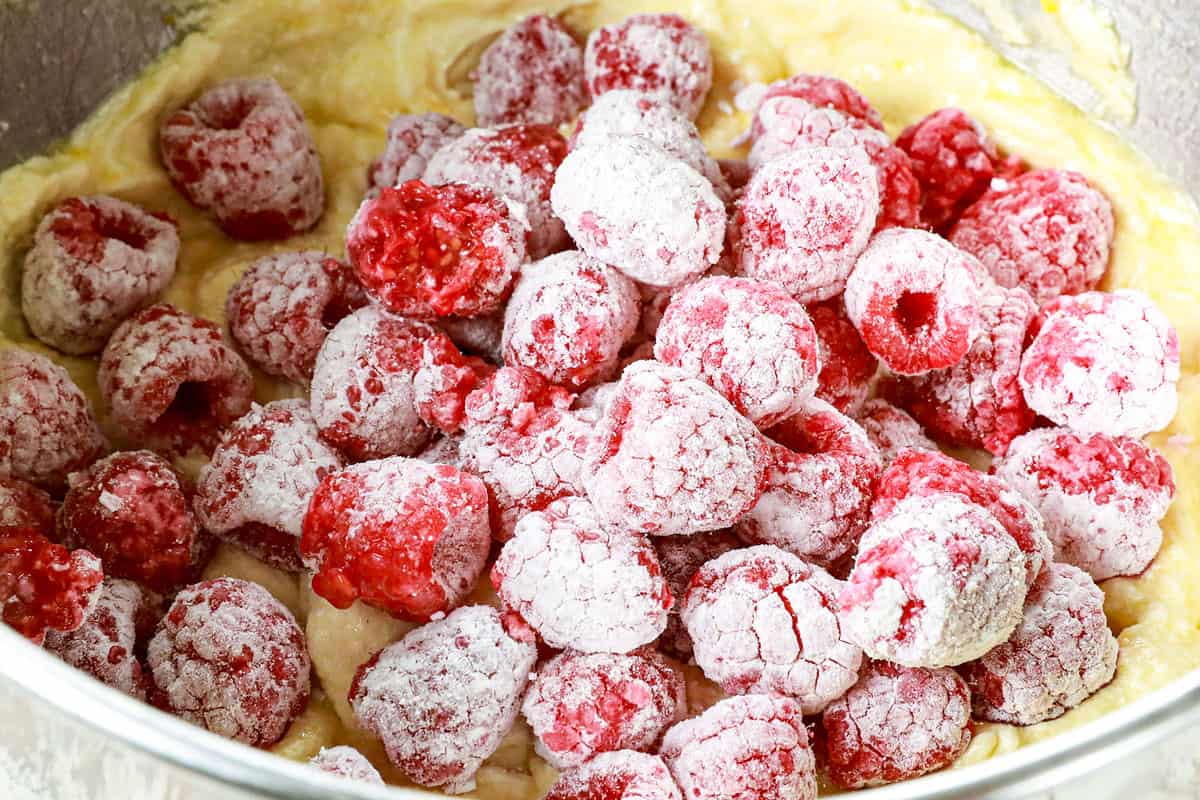
- Coat raspberries: Add 9 oz. raspberries to a medium bowl and toss with 1 tablespoon flour. Set aside.
- Mix wet ingredients: Whisk the eggs, milk, lemon juice, lemon zest, and vanilla extract together in a 3-cup (or more) liquid measuring cup. Set aside.
- Mix dry ingredients: Using a stand mixer fitted with a paddle attachment, mix the cake flour, sugar, baking powder, and salt on the lowest speed until combined, about 20 seconds.
- Add butter: With the mixer still running on low speed, add 1 piece of butter at a time and beat until all the butter is incorporated. Increase the speed to medium and continue beating until the mixture resembles a coarse meal, with butter bits no larger than small peas.
- Add wet ingredients: With the mixer running on low, add approximately half of the egg mixture to the flour mixture. Increase speed to medium-high and beat until light and fluffy, approximately 60 seconds. Reduce the speed to medium-low, then add the remaining egg mixture and beat until incorporated, about 30 seconds (batter may look slightly curdled). DO NOT OVERMIX.
- Add raspberries: Stir in the 9 ounces of coated raspberries just until evenly combined.
- Bake: Divide the batter evenly between the prepared cake pans (I use a kitchen scale), smooth with a spatula,and drop a few times on the counter to remove air bubbles. Bake at 350 degrees F for 27-32 minutes or until a toothpick inserted in the center of the cakes comes out with just a few crumbs.
- Cool: Cool cakes in the pans for 10 minutes, then remove them from the pans and transfer to wire racks to cool completely.
- Freeze (optional): Time permitting, after cooling, freeze the cakes for 30-60 minutes to make them easier to slice in half. (Make ahead: Alternatively, tightly wrap the cooled cakes in plastic wrap at this point and refrigerate until ready to slice and frost.)
FROSTING
- Combine ingredients: Using a stand mixer fitted with the paddle attachment, beat the cream cheese and butter together at medium speed until very creamy. Beat in lemon juice, lemon zest, vanilla extract, and salt until smooth.
- Add powdered sugar: Gradually beat in the powdered sugar, then beat at medium-high speed until smooth and fluffy.If the frosting is too runny, refrigerate it until it sets more. Alternatively, add powdered sugar until it reaches the desired consistency, then season with a pinch of salt to taste; otherwise, it will be too sweet. If the frosting is too thick, thin with milk, 1 tablespoon at a time.
ASSEMBLE
- Prepare stand: Place four strips of parchment paper around the edges of a plate or cake stand to create a square with an open space in the middle (to keep cake stand clean).
- Slice cakes: Cut cakes in half horizontally using a long-serrated knife or cake leveler to create 4 even layers. Place 1 cake layer, cut side up, on the prepared serving plate/cake stand.
- First Cake: Transfer some frosting to a piping bag (or Ziploc bag). Pipe a ring of frosting just inside the top edge of the cake. Add ⅓ of the chilled Raspberry Jam and spread it to the edges of the piped frosting. (Note: If raspberry jam is too thick, microwave it for just a few seconds.) Add about ¾ cup frosting and spread it to the edges of the cake.
- Second Cake: Top with the second leveled cake, top side down. Repeat procedure with piping/raspberry filling/frosting.
- Third and Fourth Cake: Top with the third cake, and repeat the procedure with piping/raspberry filling/frosting. Add the final cake, most even side up (usually you add the top side down, but the raspberries can make it uneven).
- Freeze (optional): Time permitting, place the cake in the freezer for 15-30 minutes to chill and harden the frosting slightly. This step prevents the top layer from sliding around on slick, warm frosting while you apply your crumb coat. (Make Ahead: Alternatively, cover the cake with plastic wrap and refrigerate until you're ready to continue.)
FROST CAKE
- Crumb coat: Set aside about ¾ cup of frosting for the “crumb coat.” Frost the cake starting with the top and working down until the cake is evenly, thinly frosted. Freeze the cake for 15-30 minutes or until the crumb layer has set.t.
- Frost cake: Frost the outside of the cake as you desire with the remaining frosting. Remove parchment paper, then pipe a ring of frosting around the bottom of the cake. Garnish with raspberries if desired.
CHILL THEN SLICE
- Chill: Freeze the cake for 20-30 minutes to firm up before slicing, or if not serving immediately, refrigerate for at least 45 minutes before slicing.
- Serve at room temperature: After slicing, let it come to room temperature before serving.
STORE
- The frosted cake should be covered with an inverted bowl or cake cover and refrigerated. Slice while chilled, but bring cake to room temperature before serving.
Video
Notes
Ingredient Notes
- Cake flour substitute: Sift 1 ¾ cup all-purpose flour and ¼ cup cornstarch together in a large bowl. Repeat sifting 2-3 times more to aerate the mixture so it’s closer to the consistency of real cake flour.
- Store-bought raspberry jam: You’ll need about 1 ⅓ cups seedless raspberry jam. If your store-bought jam is too difficult to spread, microwave it for 10 seconds
- Raspberry filling consistency: The raspberry filling should be chick and barely spreadable so that it stays in place and doesn’t run over the edges, otherwise, you’ll have cake layers sliding all over the place! If the jam thickens too much, microwave it for 10 seconds.
Prep Ahead
- Raspberry Filling: can be made and refrigerated up to 1 week in advance or frozen for up to three months.
- Frosting: can be made up to 24 hours, covered and refrigerated. Let it come close to room temperature before re-whipping if needed.
- Cakes: make, cool, and wrap tightly in plastic wrap and refrigerate one day in advance or freeze for up to 3 months.
- Crumb Coated Cake: let the crumb coat set completely, then tightly wrap the cake in plastic wrap and refrigerate or freeze until ready to finish frosting.
- Frosted Cake: Assemble the entire cake, cover with a cake cover or tent with foil then refrigerate for 24 hours before slicing, then allowing to sit at room temperature before serving.
HOW TO STORE AND FREEZE
- To store: The assembled and frosted cake should be covered with a cake cover or foil and refrigerated. It may be stored for up to 5 days, but is at peak freshness the first two days. Slice the cake, then bring to room temperature before serving.
- To freeze individual cake layers: Tightly wrap the individual cake layers in plastic wrap and freeze for up to three months.
- To freeze crumb coated cake: Tightly wrap the set cake in a couple layers of plastic wrap followed by a couple layers of foil, freeze for up to two months.
- To freeze frosted cake: Flash freeze the cake until solid, then tightly wrap in a couple layers of plastic wrap followed by a couple layers of foil, freeze for up to two months. Remove the plastic wrap, transfer to a cake container and allow to thaw overnight in the refrigerator before slicing. After slicing, let come to room temperature before serving.
Want To Make This Recipe?

Did You Make This Recipe?
Tag @CarlsbadCravings and Use #CarlsbadCravngs
Leave a Review, I Always Love Hearing From You!


HaimWisley says
looks so cool !!
Jen says
Thank you, I’m excited for you to try it!
Margaret Harris says
The lemon raspberry cake turned out beautifully. It took almost an hour to bake.
I suspect that may be the density of the flour, (ap and corn starch).
It made a wonderful birthday cake.
Thank you.
Jen says
I’m so happy it turned out so well for the special day!
Morgan says
This cake is delicious and so rich! I made it for a birthday party and everyone loved it. Thank you for all your delicious and thoughtful recipes. One of my favorite things is when I see a new recipe posted on your blog!
Jen says
Thank you so much, Morgan, comments like yours make my day! I am so happy this cake was a winner and that you are enjoying my recipes! I hope you have a wonderful week and find more recipes to enjoy!
Brenda says
I love all of your recipes. I am baking the Lemon and Raspberry Cake now. I can’t wait to finish making it. The recipe is missing the step to add in the raspberries to the cake. I think it needs that step between step 6 and 7.
Jen says
Just fixed! I appreciate you pointing that out!
Cynthia Angel says
Hello!
I am a Lil confused.. Under ‘Tools Needed’ It calls for Two 9″ Pans.. However.. Under Cake Instructions.. It calls for Two 8″ Cake Pans.
Please Clarify.
Thank You!
Jen says
Sorry Cynthia, I have an assistant adding the “tools needed.” The recipe is correct with the 8-inch round pans. I’ll correct the tools section. Thanks for pointing that out!
Cathy McCallum says
Made it. Was delicious!
Jen says
Yay! Thanks for giving this recipe a try!
Alyssa says
Wow. This cake was perfection. The brightness of the raspberries paired so beautifully with the lemon. The cake was the perfect texture. I made this cake for my mother in laws birthday and my husband claimed it was the best cake he ever tried! It was a labor of love but worth every minute. Next time, I’d skip the de-seeding step. Outside of that I will follow to a tee again.
Jen says
Thank you for the high praise Alyssa! I’m so glad that it turned out so delicious for your mother in law’s birthday! Thanks for sharing the love!
Heather says
One of the most delicious cakes I’ve ever eaten! Made this for our family’s Easter celebration. Everyone absolutely loved it! The lemon cream cheese frosting was heavenly! Thank you for all the wonderful recipes! You helped make my favorite holiday even more special!
Jen says
This is so incredibly sweet—thank you Heather! I’m honored it was part of your Easter celebration with your family The lemon cream cheese frosting is one of my favorites too, so I’m extra happy to hear it was a hit! Cheers!